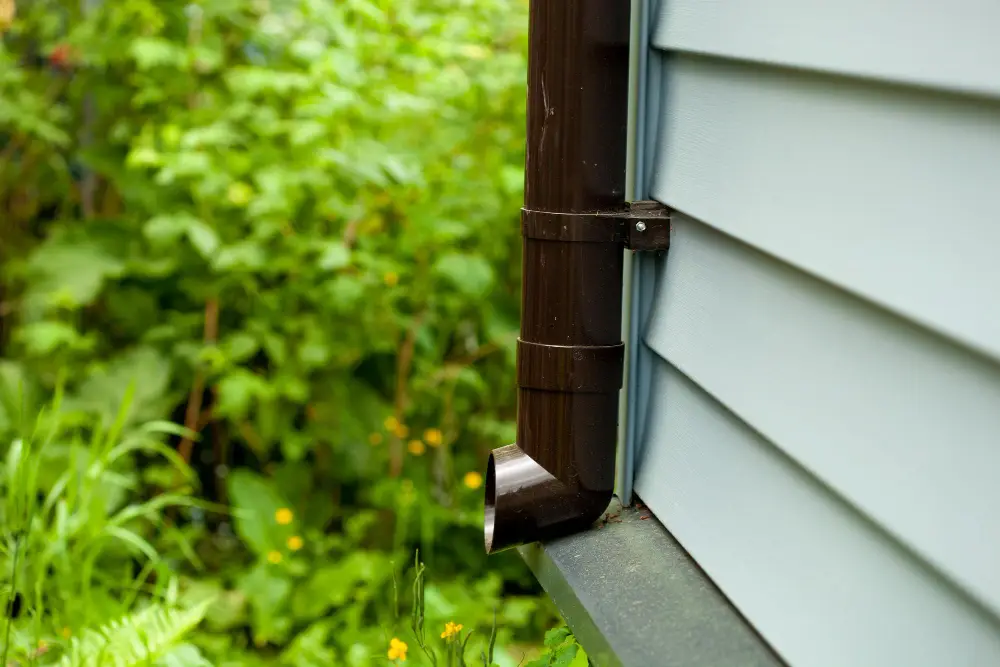
Downspouts carry water from the gutters down to ground level and direct it away from your foundation. A properly installed downspout system prevents water damage to your home’s structure and landscaping. This guide covers the process of installing downspouts, from connecting to the gutter to establishing proper drainage at ground level.
Planning Downspout Placement
Before installing downspouts, determine where they will go and how they will route water away from the building.
Spacing Requirements
Downspouts should be placed every 20 to 30 linear feet of gutter. A 50-foot gutter run needs at least two downspouts. More downspouts improve drainage and reduce stress on the gutter system during heavy rain.
Location Considerations
Position downspouts at corners of the building when possible. Corner placement keeps downspouts out of high-visibility areas and often provides better drainage routes. Avoid placing downspouts where they will interfere with walkways, doors, or windows.
Consider where the water will go after it exits the downspout. Each downspout needs a clear path for water to flow away from the foundation. If a particular location would discharge into a problem area, choose a different spot or plan for underground drainage.
Measuring for Materials
For each downspout location, measure from the drop outlet on the gutter down to the discharge point at ground level. Account for any horizontal offsets needed to bring the downspout from the roofline to the wall position.
Calculate the materials needed for each downspout:
Two elbows for the offset at the top, connecting the drop outlet to the vertical run Straight downspout sections for the vertical run One elbow at the bottom for the discharge Brackets to secure the downspout to the wall, typically one every six feet
Add extra length for overlap at joints. Each joint requires two to three inches of overlap.
Installing the Drop Outlet
The drop outlet creates the connection point between the gutter and the downspout.
Marking the Location
Position the drop outlet on the underside of the gutter where you want the downspout connection. Center it over the planned downspout location. Trace around the outlet opening with a marker.
Cutting the Opening
Drill a starter hole inside the traced line. Use tin snips to cut to the line, staying just inside the mark. Test fit the outlet and trim if needed for a snug fit.
Securing the Outlet
Apply a bead of gutter sealant around the flange of the drop outlet. Insert the outlet into the opening from below. Press the flange firmly against the bottom of the gutter.
Secure the outlet with pop rivets or screws through the flange. Space fasteners evenly around the outlet perimeter.
Assembling the Top Offset
Most installations require an offset at the top to bring the downspout from the gutter line in to the wall.
Attaching the First Elbow
Connect an elbow to the bottom of the drop outlet. The elbow should point toward the wall. Use sheet metal screws or pop rivets to secure the connection.
Measuring the Offset Section
Measure the horizontal distance from the elbow to the wall position. Cut a short piece of downspout to span this gap plus the overlap needed for both connections.
Connecting the Offset
Crimp one end of the offset section using a crimper tool. The crimped end slides into the next piece. Insert the crimped end into the first elbow. Attach the second elbow to the other end of the offset, pointing downward.
Installing the Vertical Run
The vertical section carries water from the top offset down to ground level.
Measuring & Cutting Sections
Measure from the bottom of the second elbow to the point where you want the downspout to end above ground level. Standard practice leaves six to eight inches between the bottom of the downspout and the ground.
Downspout sections typically come in 10-foot lengths. For longer runs, you will need to connect multiple sections. Cut sections to length with tin snips or a hacksaw.
Crimping for Connection
Crimp the end of each section that will insert into another piece. The crimped end always points down so water flows over the joint rather than into it.
Assembling Sections
Connect sections by inserting the crimped end into the uncrimped end of the next piece. Overlap by two to three inches. Secure each joint with screws or rivets.
Securing Downspouts to the Wall
Downspouts must be fastened to the wall to prevent movement and damage.
Bracket Types
Strap brackets wrap around the downspout and screw to the wall on both sides. These provide secure attachment and work on most wall types.
Clip brackets hold the downspout from one side. They are less visible but may allow more movement in high winds.
Bracket Spacing
Install a bracket within six inches of the top offset and within six inches of the bottom elbow. Space additional brackets every five to six feet along the vertical run.
Attaching Brackets
For wood siding, drive screws directly through the bracket into the wall framing. Use exterior-rated screws long enough to reach solid wood.
For masonry walls, drill holes with a masonry bit and install wall anchors before driving screws.
For vinyl or aluminum siding, locate the underlying framing and drive screws through the siding into solid wood.
Avoiding Over-Tightening
Tighten brackets enough to hold the downspout firmly but not so tight that they crush or deform the material. The downspout should be secure without visible compression marks.
Installing the Bottom Elbow
The bottom elbow directs water away from the foundation at ground level.
Positioning the Elbow
Attach an elbow to the bottom of the vertical downspout section. Point the elbow away from the foundation. The discharge should direct water at least three feet away from the building, and farther is better.
Securing the Connection
Fasten the elbow to the downspout with screws or rivets. This joint takes more stress than others because it is at ground level where it can be bumped or kicked.
Establishing Ground-Level Drainage
Getting water away from the foundation is the final step in the downspout installation.
Splash Blocks
Splash blocks are plastic or concrete trays that sit on the ground below the downspout discharge. They prevent erosion directly under the outlet and direct water away from the foundation.
Position the splash block with the low end pointing away from the building. The block should slope downward so water flows off rather than pooling.
Downspout Extensions
Extensions attach to the bottom elbow and carry water farther from the foundation. Flexible extensions can route around landscaping. Rigid extensions provide a more permanent solution.
Extend downspout discharge at least four feet from the foundation in areas with clay soil or drainage concerns. Six feet or more provides better protection.
Underground Drainage
For situations where surface drainage is impractical, underground drain pipes can carry water to a dry well, rain garden, or storm drain connection. Bury a smooth-wall pipe from the downspout discharge to the destination. Maintain at least a one percent slope for drainage. Install a debris screen at the entrance to prevent clogs.
Underground drainage requires more installation effort but keeps water completely away from high-traffic areas and eliminates visible extensions.
Testing the Installation
After completing the installation, test the system before considering the job done.
Run water from a hose into the gutter above the downspout. Watch the entire path from gutter to ground discharge. Look for leaks at joints, areas where water sprays out, and any sections where water does not flow freely.
Check that splash blocks or extensions direct water away from the foundation. Water should not pool against the building.
Verify that brackets hold the downspout securely. Push gently on the downspout to check for movement.
Dirt Road Repairs installs downspout systems that drain properly and protect your foundation from water damage. Contact us to schedule a consultation and get a quote for your gutter and downspout project.